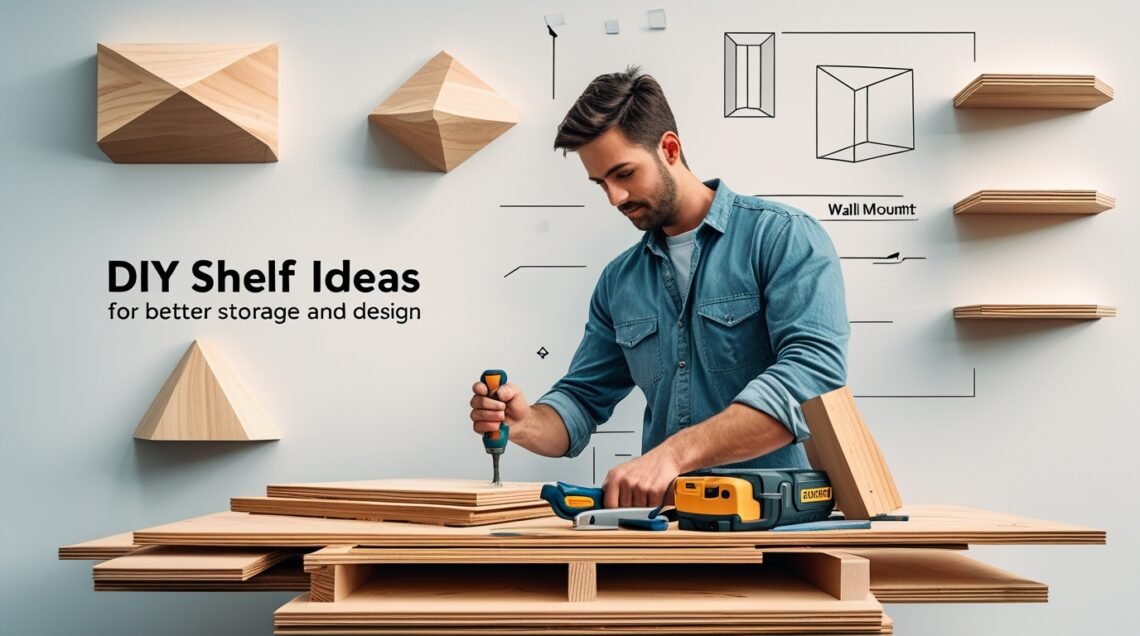
My small apartment was buried in clutter. Store-bought shelves were useless. I decided the only way to get better storage and design was to build it myself. These are the easiest DIY shelf ideas I used to conquer my clutter, maximize vertical space, and achieve amazing home decor projects on a tiny budget.
1. Clean Design for Better Storage and Design:
The floating shelf is the ultimate minimalist solution. It looks like the wood is simply defying gravity, giving your space an instant, clean, gallery-like feel. They were the first DIY shelf ideas I tackled because they solve the problem of clutter while achieving incredible better storage and design aesthetics.
Why They Work for Small Space Organization:
Traditional shelves have visible brackets that create visual clutter, breaking up the wall space and making a small room feel busy. Floating shelves DIY hide the brackets inside the shelf, creating an uninterrupted line that fools the eye into thinking the room is sleek and bigger.
The Floating Shelves DIY Cheat Sheet:
Building a basic, sturdy floating shelf requires a specific method. I learned the hard way that you can’t just stick a piece of wood to the wall, especially if you want them to hold books.
- The Bracket Choice: The secret is a heavy-duty hidden bracket (often a metal rod system). Choose one rated for the weight you plan to put on it. Books require anchoring into studs.
- The Stud Finder Mandate: Before you drill anything, use a stud finder. Drywall anchors are fine for lightweight photos, but for real, better storage and design (like a stack of heavy novels), you must hit a stud (the vertical wood frames inside your wall). My rule: always install into at least one stud, preferably two.
- The Level Rule: Mark your bracket holes using a pencil, then place your level on top of those marks. The smallest tilt will look massive once the shelf is up. A piece of painter’s tape across the back of the shelf can help you mark the holes precisely before holding it up to the wall.
- The Final Slide: You drill pilot holes, secure the hidden bracket into the studs (and use toggle bolts or heavy-duty anchors for other holes), then slide the hollowed-out shelf over the bars.
This technique is a game-changer for small space organization because it maximizes vertical space while looking like pure, effortless style.
2. Pipe Shelving for Maximum Vertical Space:
After mastering the floating shelf, I needed something heavy-duty for my office/living room, something that could hold a library’s worth of books and look cool doing it. That’s how I discovered the power of the pipe shelf.
This is one of the best custom shelving solutions because you can build it floor-to-ceiling, wall-to-wall, and the materials (metal pipes and wooden boards) are available at any hardware store.
The Anatomy of Pipe Shelving:
Industrial pipe shelving uses black iron pipe pieces (or galvanized, but black is more common for the look) and fittings, Tees, Elbows, and Flanges, to create a sturdy frame.
- The Flange (The Foot): This circular piece has screw holes and is the part that attaches directly to the wall or the floor. Always drill the flanges into studs. This shelving system is heavy, even before you put anything on it.
- The Pipe Nipple (The Length): These are the threaded pipe pieces that define the height between your shelves or the distance the shelf sticks out from the wall.
- The Wood (The Shelf): I use simple pine or reclaimed wood boards. You can stain them dark for a rustic look or paint them white for a modern edge.
Building Tall to Maximize Vertical Space:
To achieve genuinely better storage and design in a tiny room, you need height. I designed my pipe shelf to go almost to the ceiling.
- I pre-assembled one full vertical support bracket (Flanges, pipes, and all the T-fittings for the shelves) on the floor first. This ensured all the shelf arms were perfectly lined up before drilling.
- I marked the stud locations and used a very long level to ensure the first flange was perfectly straight.
- Once the vertical supports were secured to the wall (again, into studs!), I simply laid the wooden boards across the pipe supports and secured them in place with small U-shaped pipe clamps or screws.
This method results in incredibly strong, stylish DIY shelf ideas that look like they cost thousands, but are actually one of the most cost-effective custom shelving solutions available.
3. Using Wasted Space for Small Space Organization:
If you live in a small space, you are constantly fighting for square footage. The biggest, most underutilized space in almost every home is the corner. Why buy a clunky, freestanding corner unit when you can build a set of floating custom shelving solutions right into the wall?
The Power of the Right Angle:
Corner shelves are essential for small space organization because they take an awkward, unusable space and turn it into prime real estate for books, plants, or kitchen storage. They force you to maximize vertical space where you thought no space existed.
- The Shape: You can cut a simple wooden board into a triangle, a rounded wedge, or a quarter-circle. The key is that the two straight edges meet perfectly in the corner.
- The Installation: Because corner shelves are typically smaller and hold less weight than a full floating shelf, you can often use heavy-duty wall anchors (like toggle bolts or molly bolts) if you can’t hit a stud on both walls. However, if you plan to store heavy items, you must use L-shaped metal brackets and screw at least one side into a stud.
My favorite DIY shelf ideas for the corner were simple, three-tiered floating wedges in the bathroom. They hold all the necessary toiletries and towels, freeing up the limited counter space. It’s a clean home decor project win that dramatically improved my better storage and design.
4. The Budget Book Nook:
When I first started out, my security budget (my DIY budget) was basically zero. I needed DIY shelf ideas that were essentially free and required almost no cutting or complex drilling. The answer? Repurposed wood crates and pallets.
The No-Tool Stacking Hack:
Wood crates are the ultimate building block for small space organization. They are usually cheap (or free from markets/craft stores) and already come in a ready-made box shape.
- Prep: Sand the crates down to remove any splinters. If they are used, clean them well.
- Stacking: For quicker, better storage and design, you can simply stack the crates horizontally or vertically like modular blocks. I stacked two horizontally on the floor, then placed a plain wooden board across the top to act as a seamless tabletop, and then stacked two more on top.
- Wall Mounting: For the ultimate custom shelving solutions, flip the crate on its side and mount it directly to the wall. This gives you a cubby-style shelf. Just make sure to screw the crate’s back directly into the wall studs for safety, as the entire structure relies on the few points of contact.
This is a rustic, charming way to add character through home decor projects. Plus, pallet wood is free if you can find one outside a shipping yard! It’s the perfect entry point into DIY shelf ideas because the materials are cheap and the mistakes are low-stakes.
5. The Tool Confidence Builder:
The biggest barrier to starting DIY shelf ideas is the intimidating wall of tools at the hardware store. I felt overwhelmed and convinced I needed a massive budget and a workshop. The reality is that for 99% of custom shelving solutions and basic small space organization projects, you only need three things.
This hack is about building tool confidence and realizing you don’t need a lot of expensive gear to maximize vertical space.
The Essential DIY Shelf Toolkit:
- The Drill (Your Best Friend): You need a cordless power drill/driver. It’s used to drill pilot holes and drive screws. You don’t need the most expensive model, just a reliable 18-volt battery-powered one. It’s the most important tool for safely securing any of your DIY shelf ideas.
- The Level (The Straight Edge): Whether it’s a bubble level or a laser level, this is non-negotiable. Nothing makes a great home decor project look worse than a crooked shelf. Always check your marks with the level before you drill.
- The Stud Finder (The Safety Check): For any shelf that will hold real weight (like books or dishes), you must find the wooden studs inside your wall. Screwing into drywall alone will result in a messy, failed shelf. Stud finders are cheap and are the most important safety tool for better storage and design.
For wood cutting, you can often get the hardware store to make the cuts for you! This completely bypasses the need for a saw and makes DIY shelf ideas accessible to anyone.
6. From Clutter to Home Decor Projects
You can build the most beautiful, perfectly installed custom shelving solutions, but if you just dump your clutter on them, you haven’t achieved better storage and design, you’ve just moved the mess higher up the wall.
The final hack is turning your DIY shelf ideas into actual design features. Shelves are meant to display, not just to store.
The Rule of Three (and Vertical Variety):
I use the simple Rule of Three when styling my shelves: everything on the shelf should be grouped in odd numbers (three, five, seven). Odd numbers are naturally more pleasing to the eye.
- The Triangle Method: Arrange objects in a visual triangle: place the tallest object (like a vase or a stack of books) at one corner, the medium object (like a small plant) at another, and the shortest object (like a candle or small photo frame) at the third point. This creates visual flow.
- The Vertical Variety: Don’t lay everything flat. Stack books horizontally, then place a small trinket or plant on top. Use the height of the shelf space to maximize vertical space by using tall vases or picture frames. This contrast is key to great home decor projects.
- The Blank Space Power: Don’t fill every single inch. Leave “breathing room” between your groupings. The empty space is as important as the objects on the shelf, allowing your eye to rest and appreciating the better storage and design you created.
By thinking of your shelves as mini-galleries instead of storage lockers, you complete the journey from messy clutter to intentional, beautiful small space organization.
Conclusion:
My transition from living in a cluttered mess to loving my curated space all started with a simple drill and the courage to try DIY shelf ideas. Whether you choose the sleek aesthetic of floating shelves DIY, the rugged strength of industrial pipe shelves, or simple budget crates, the goal is the same: to maximize vertical space and bring better storage and design into your home. Stop staring at the blank walls and start building your custom shelving solutions. Your next great home decor project is waiting.
FAQs:
1. What is the most crucial step for safely installing heavy-duty shelves?
Always use a stud finder and drill the main supports directly into the wooden wall studs for weight-bearing shelves.
2. What simple design hack creates a clean, minimalist look?
Building floating shelves DIY (hiding the brackets inside the shelf) to create uninterrupted lines on the wall.
3. What is the simplest, low-cost material for quick DIY shelf ideas?
Repurposed wood crates or sanded, stained pallet wood, as they require minimal cutting.
4. What does the “Rule of Three” refer to in shelf styling?
Arranging objects on the shelf in groups of three (or other odd numbers) for better visual balance and better storage and design.
5. How do you achieve small space organization using corner shelves?
Corner shelves reclaim and maximize vertical space in the most awkward, unused areas of a room.
6. What essential tool should you use before drilling any holes?
A level (bubble or laser) to ensure your marks are perfectly straight, preventing a crooked final shelf.

